> ## Documentation Index
> Fetch the complete documentation index at: https://installerguides.lunarenergy.com/llms.txt
> Use this file to discover all available pages before exploring further.
# Wall Brackets Installation
## Step 1: Install Bottom Bracket
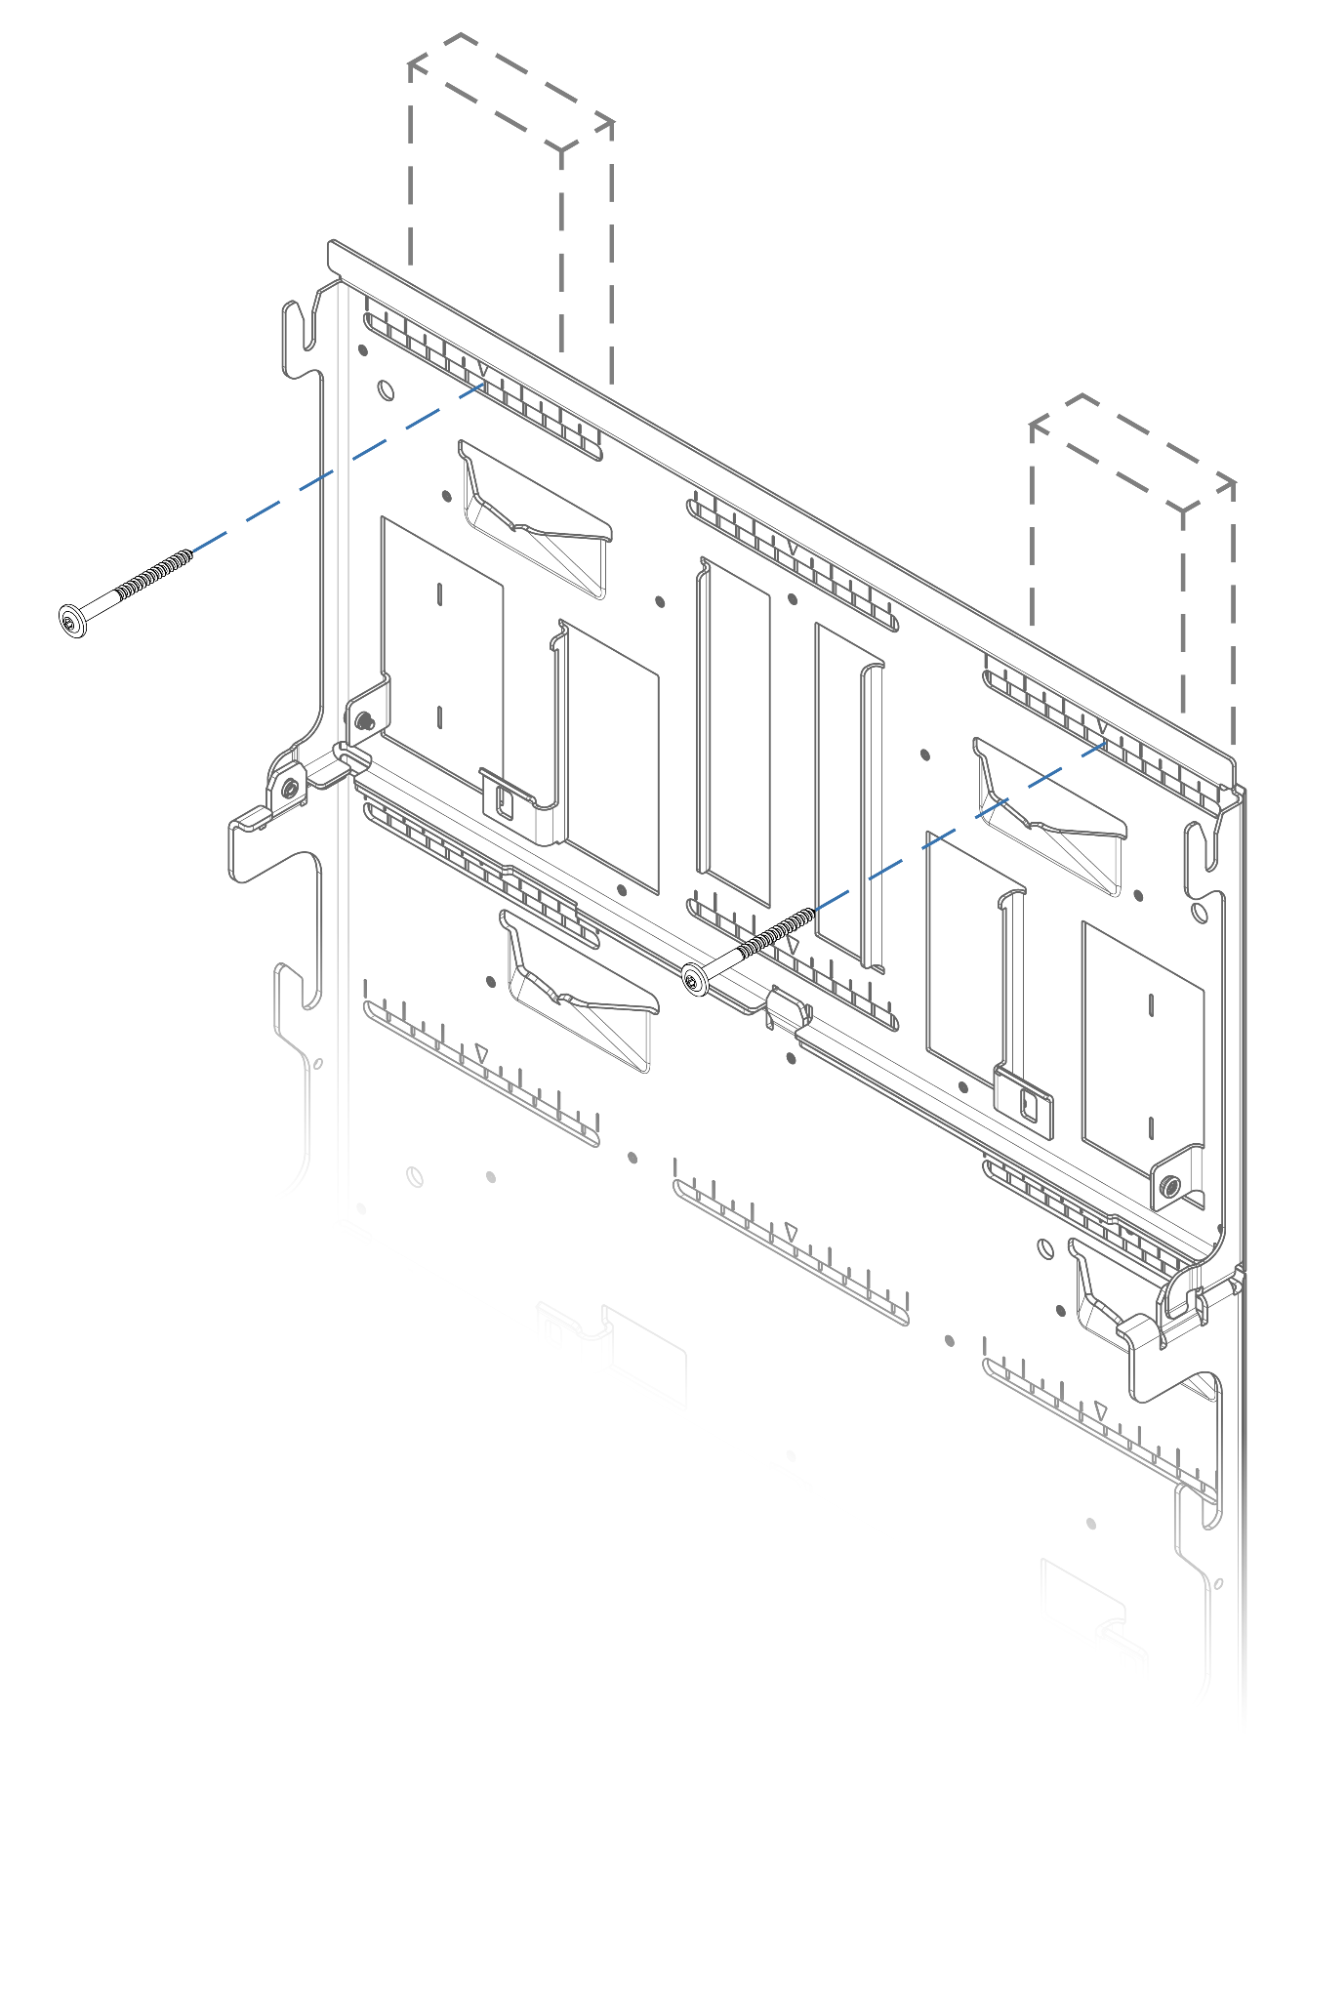
Screw the bottom DC ESS unit bracket to wall studs using **two** ¼" lag screws with 2" embedment. See available attachment points below.
 ## Step 2a: Attach Bottom Plate
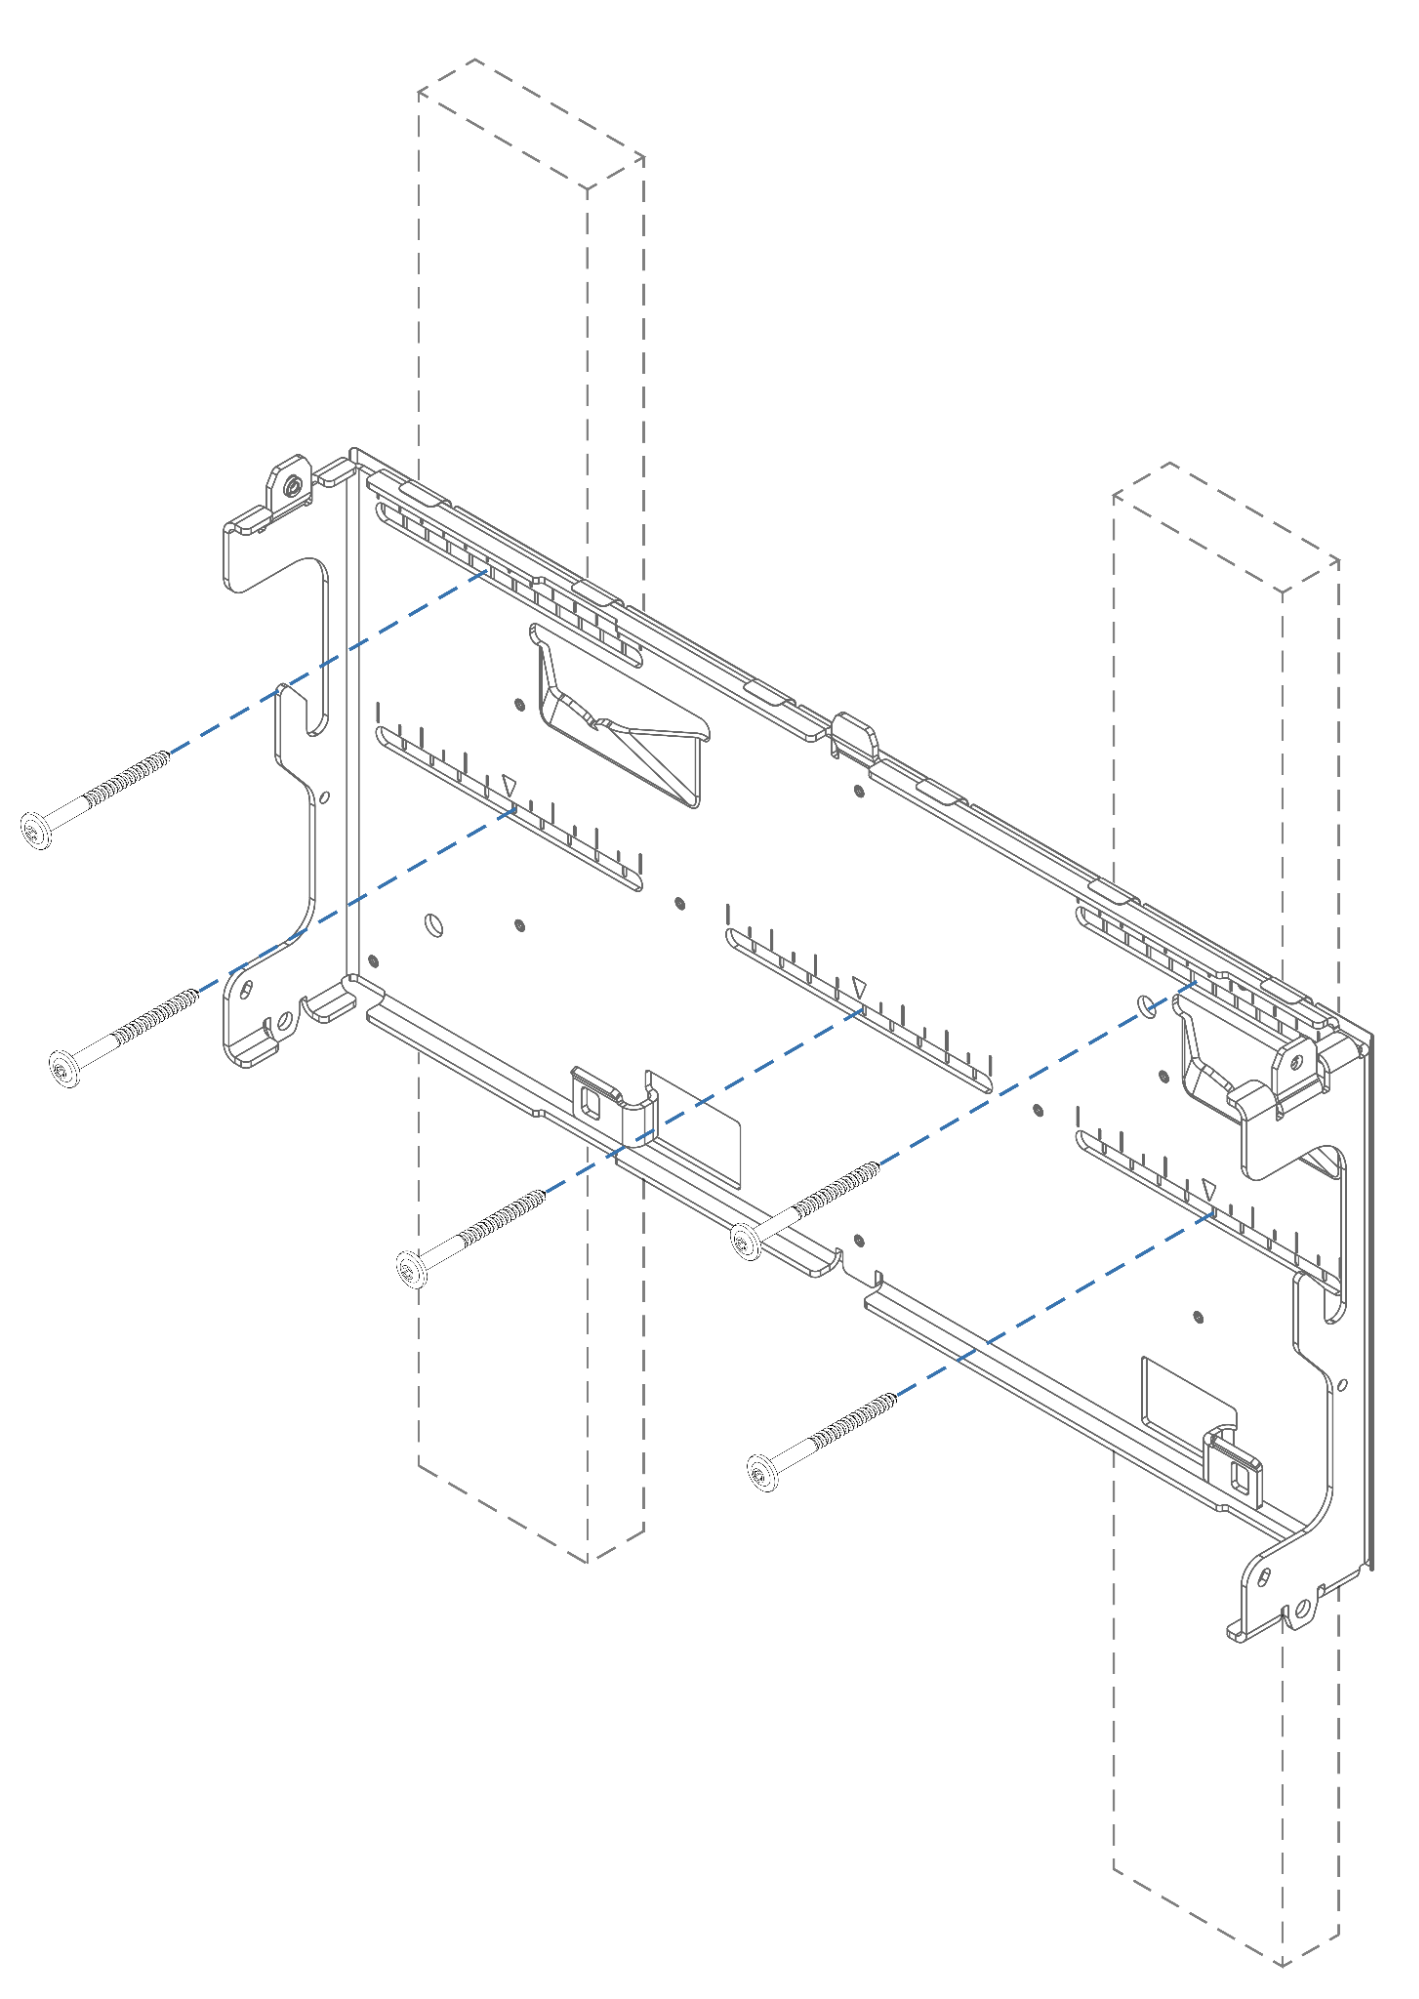
Attach the bottom plate to the first battery bracket with 4 x T25 fasteners (5.0 N-m ±10% torque) from the Hardware Kit.
## Step 2a: Attach Bottom Plate
Attach the bottom plate to the first battery bracket with 4 x T25 fasteners (5.0 N-m ±10% torque) from the Hardware Kit.
 ## Step 2b: Level Bottom Plate (Floor Mount)
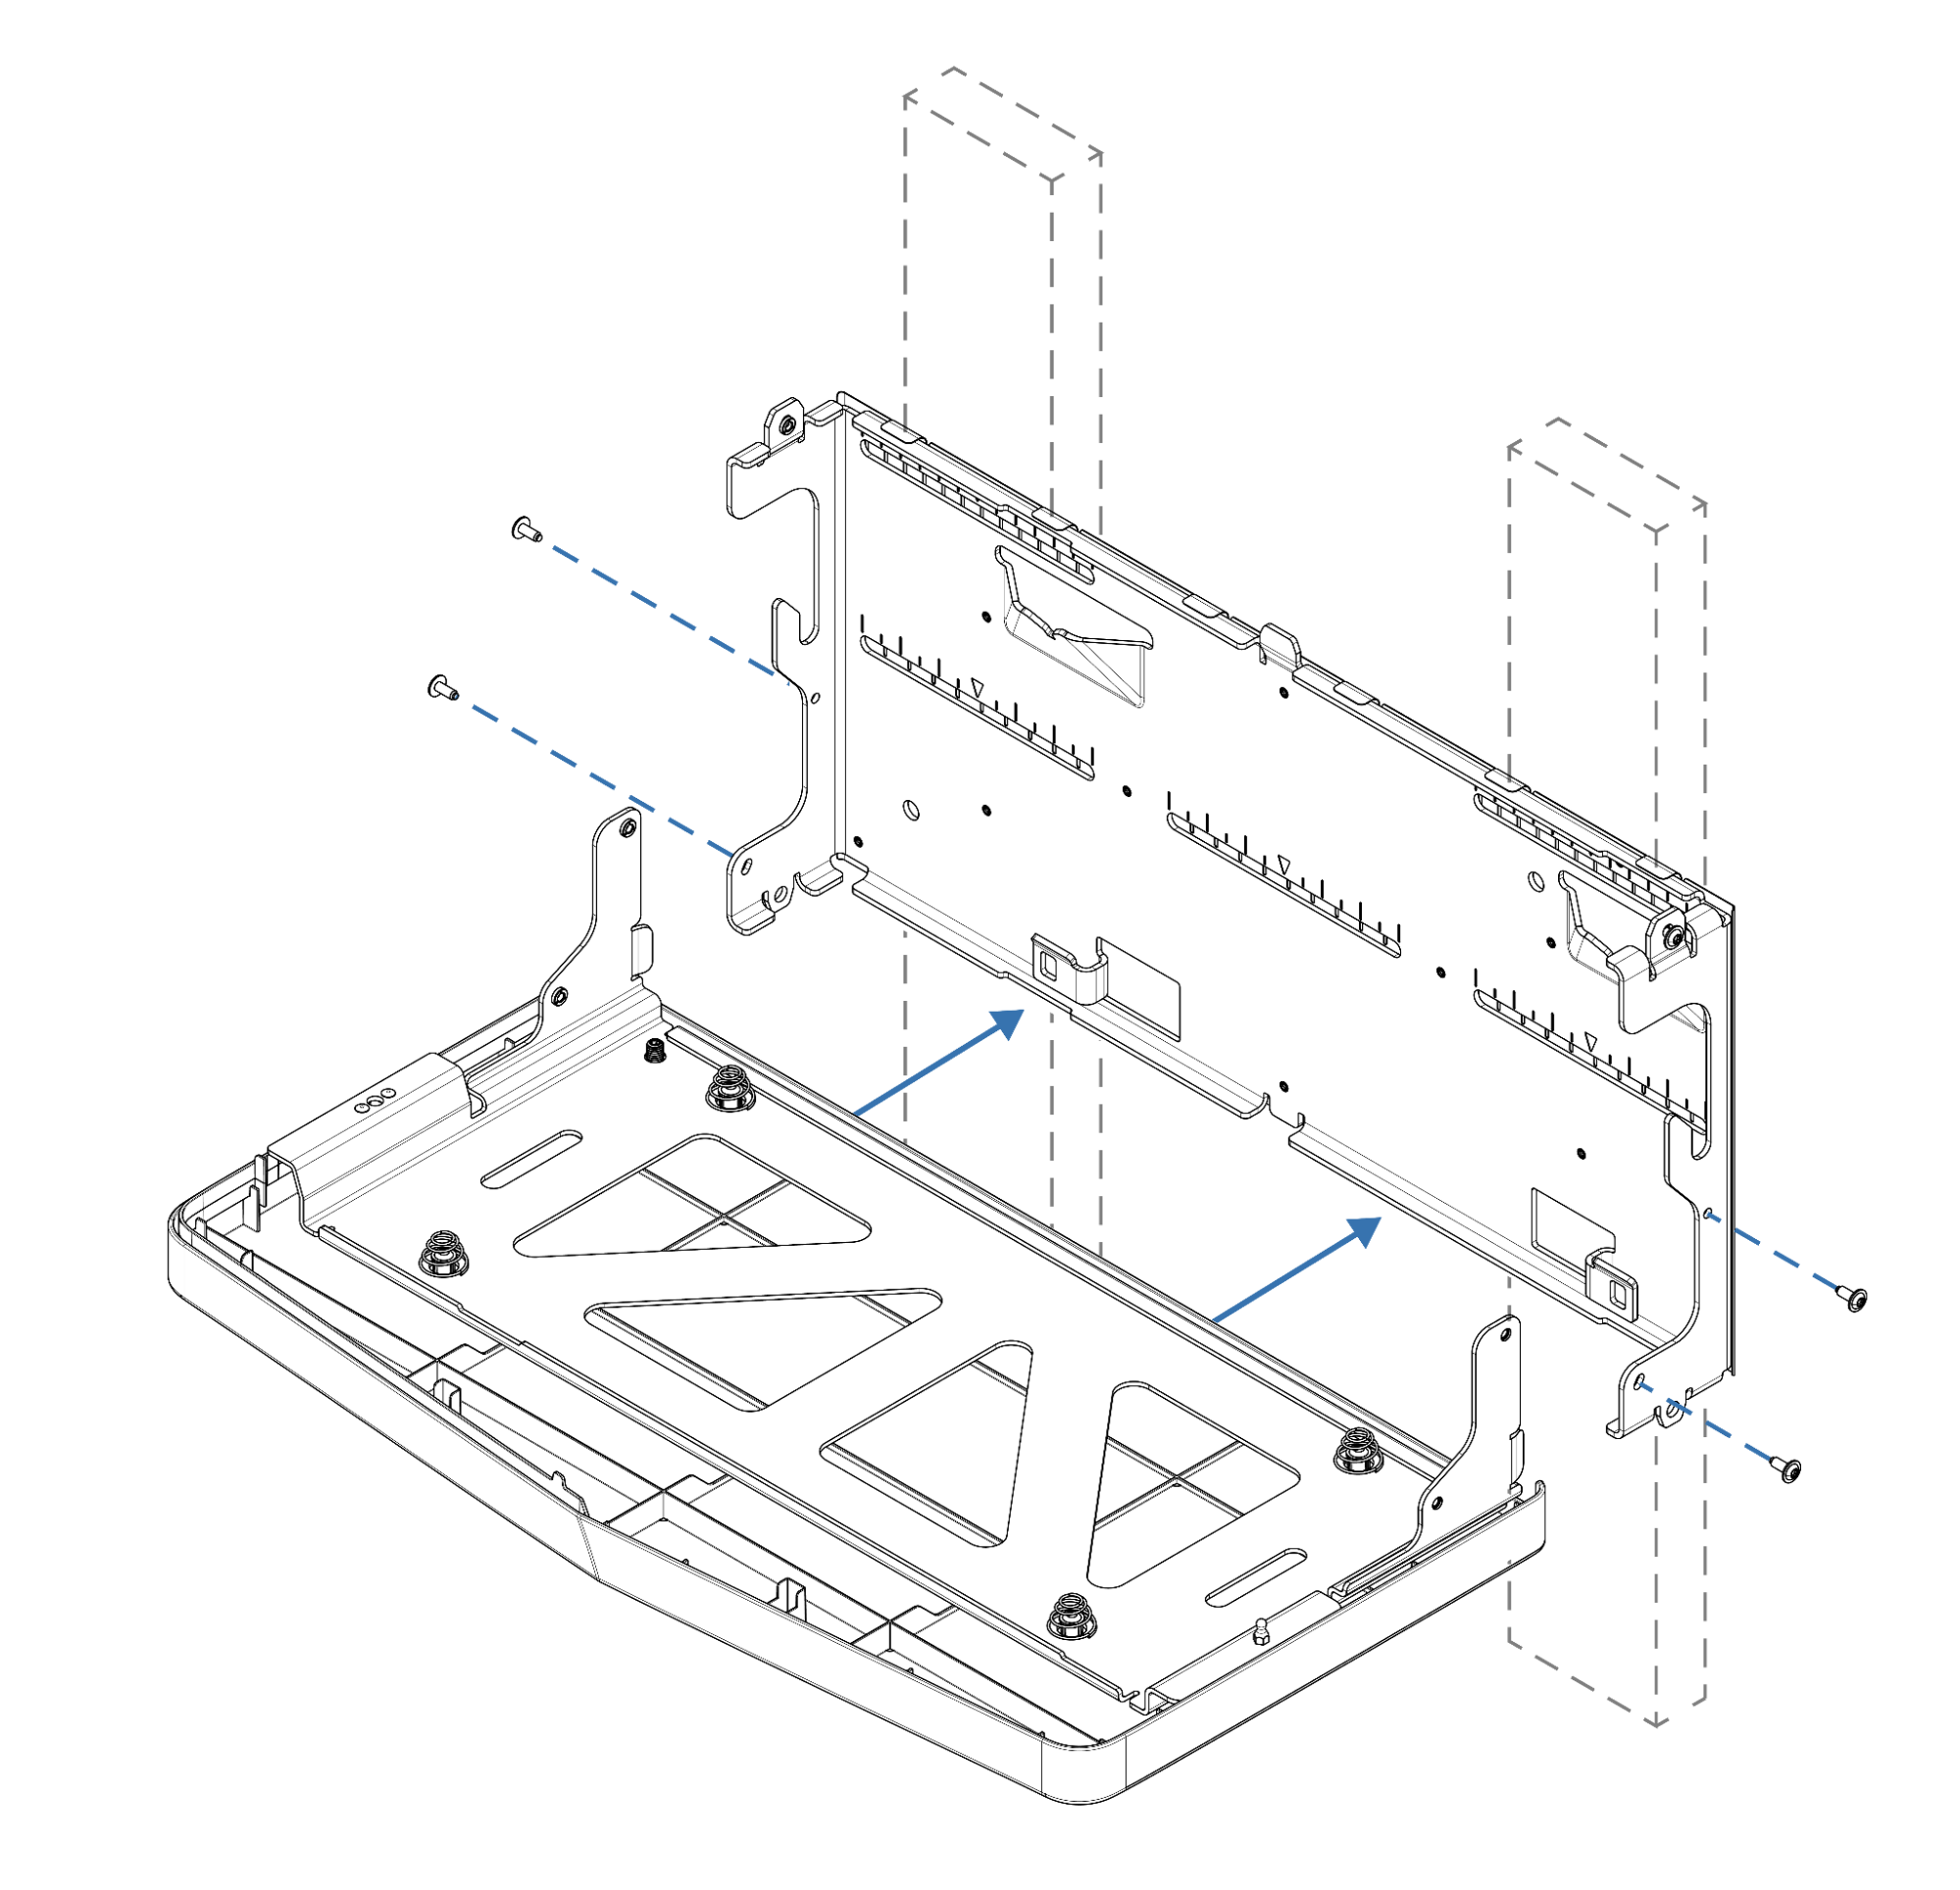
For floor mount only, adjust leveling feet to engage with the level concrete floor.
## Step 2b: Level Bottom Plate (Floor Mount)
For floor mount only, adjust leveling feet to engage with the level concrete floor.
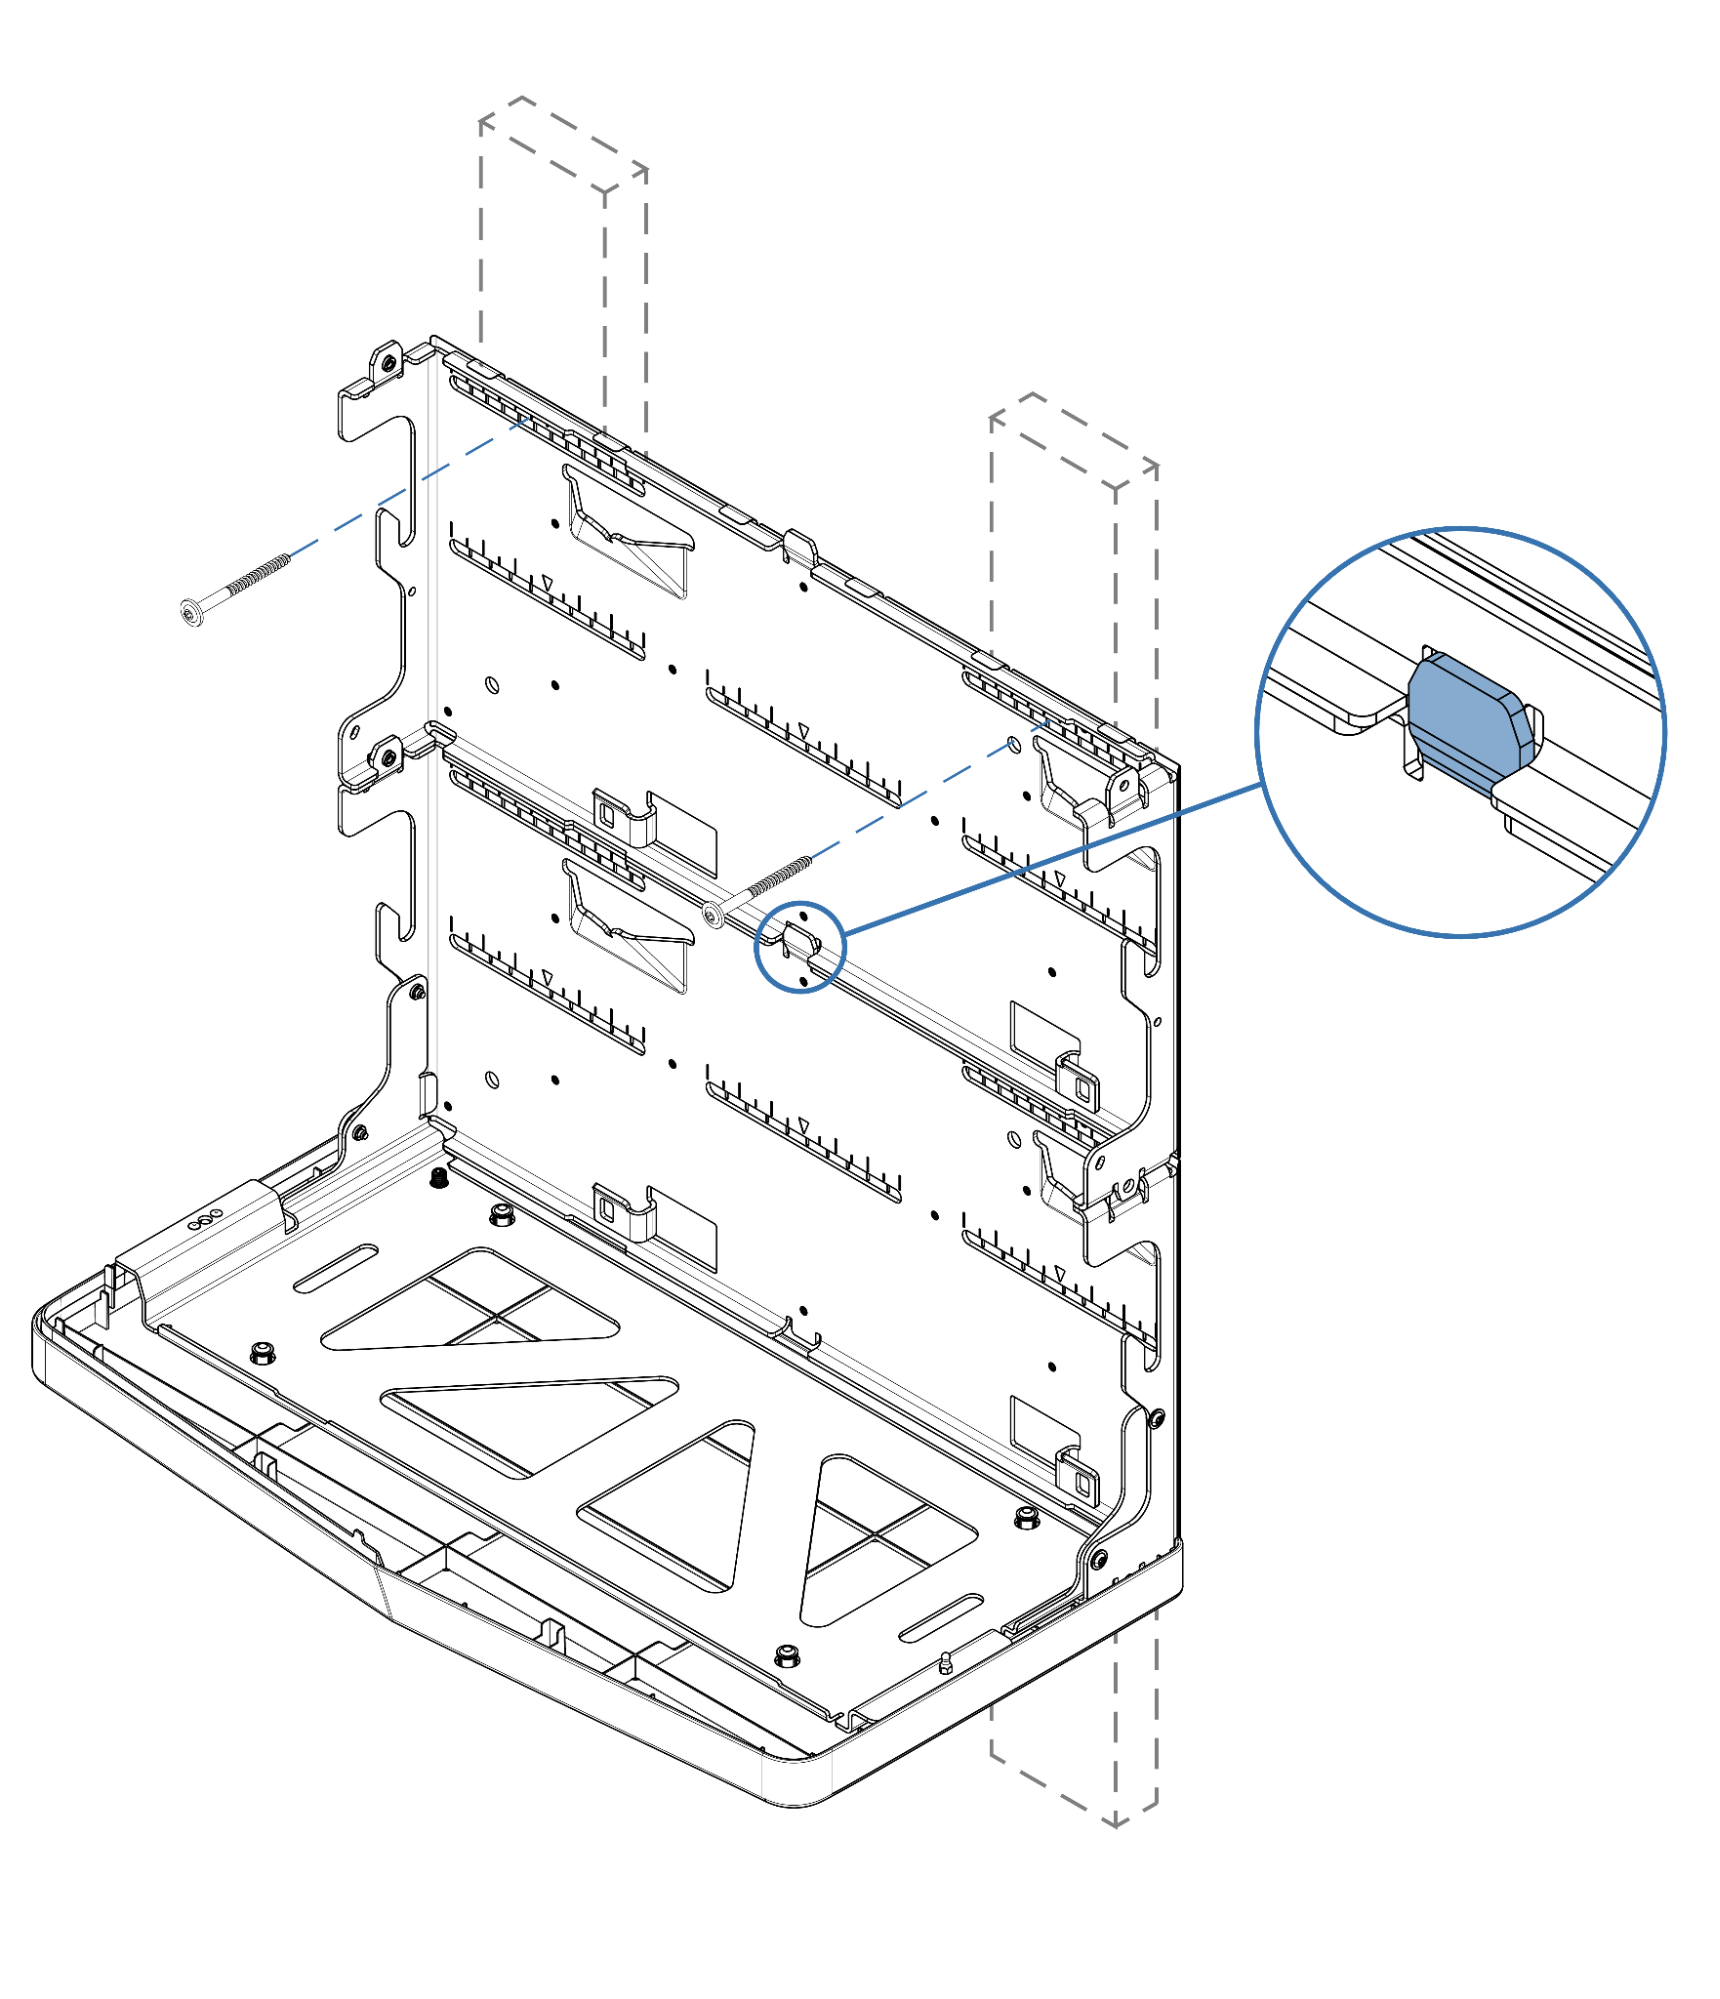
 ## Step 3a: Install Additional Brackets
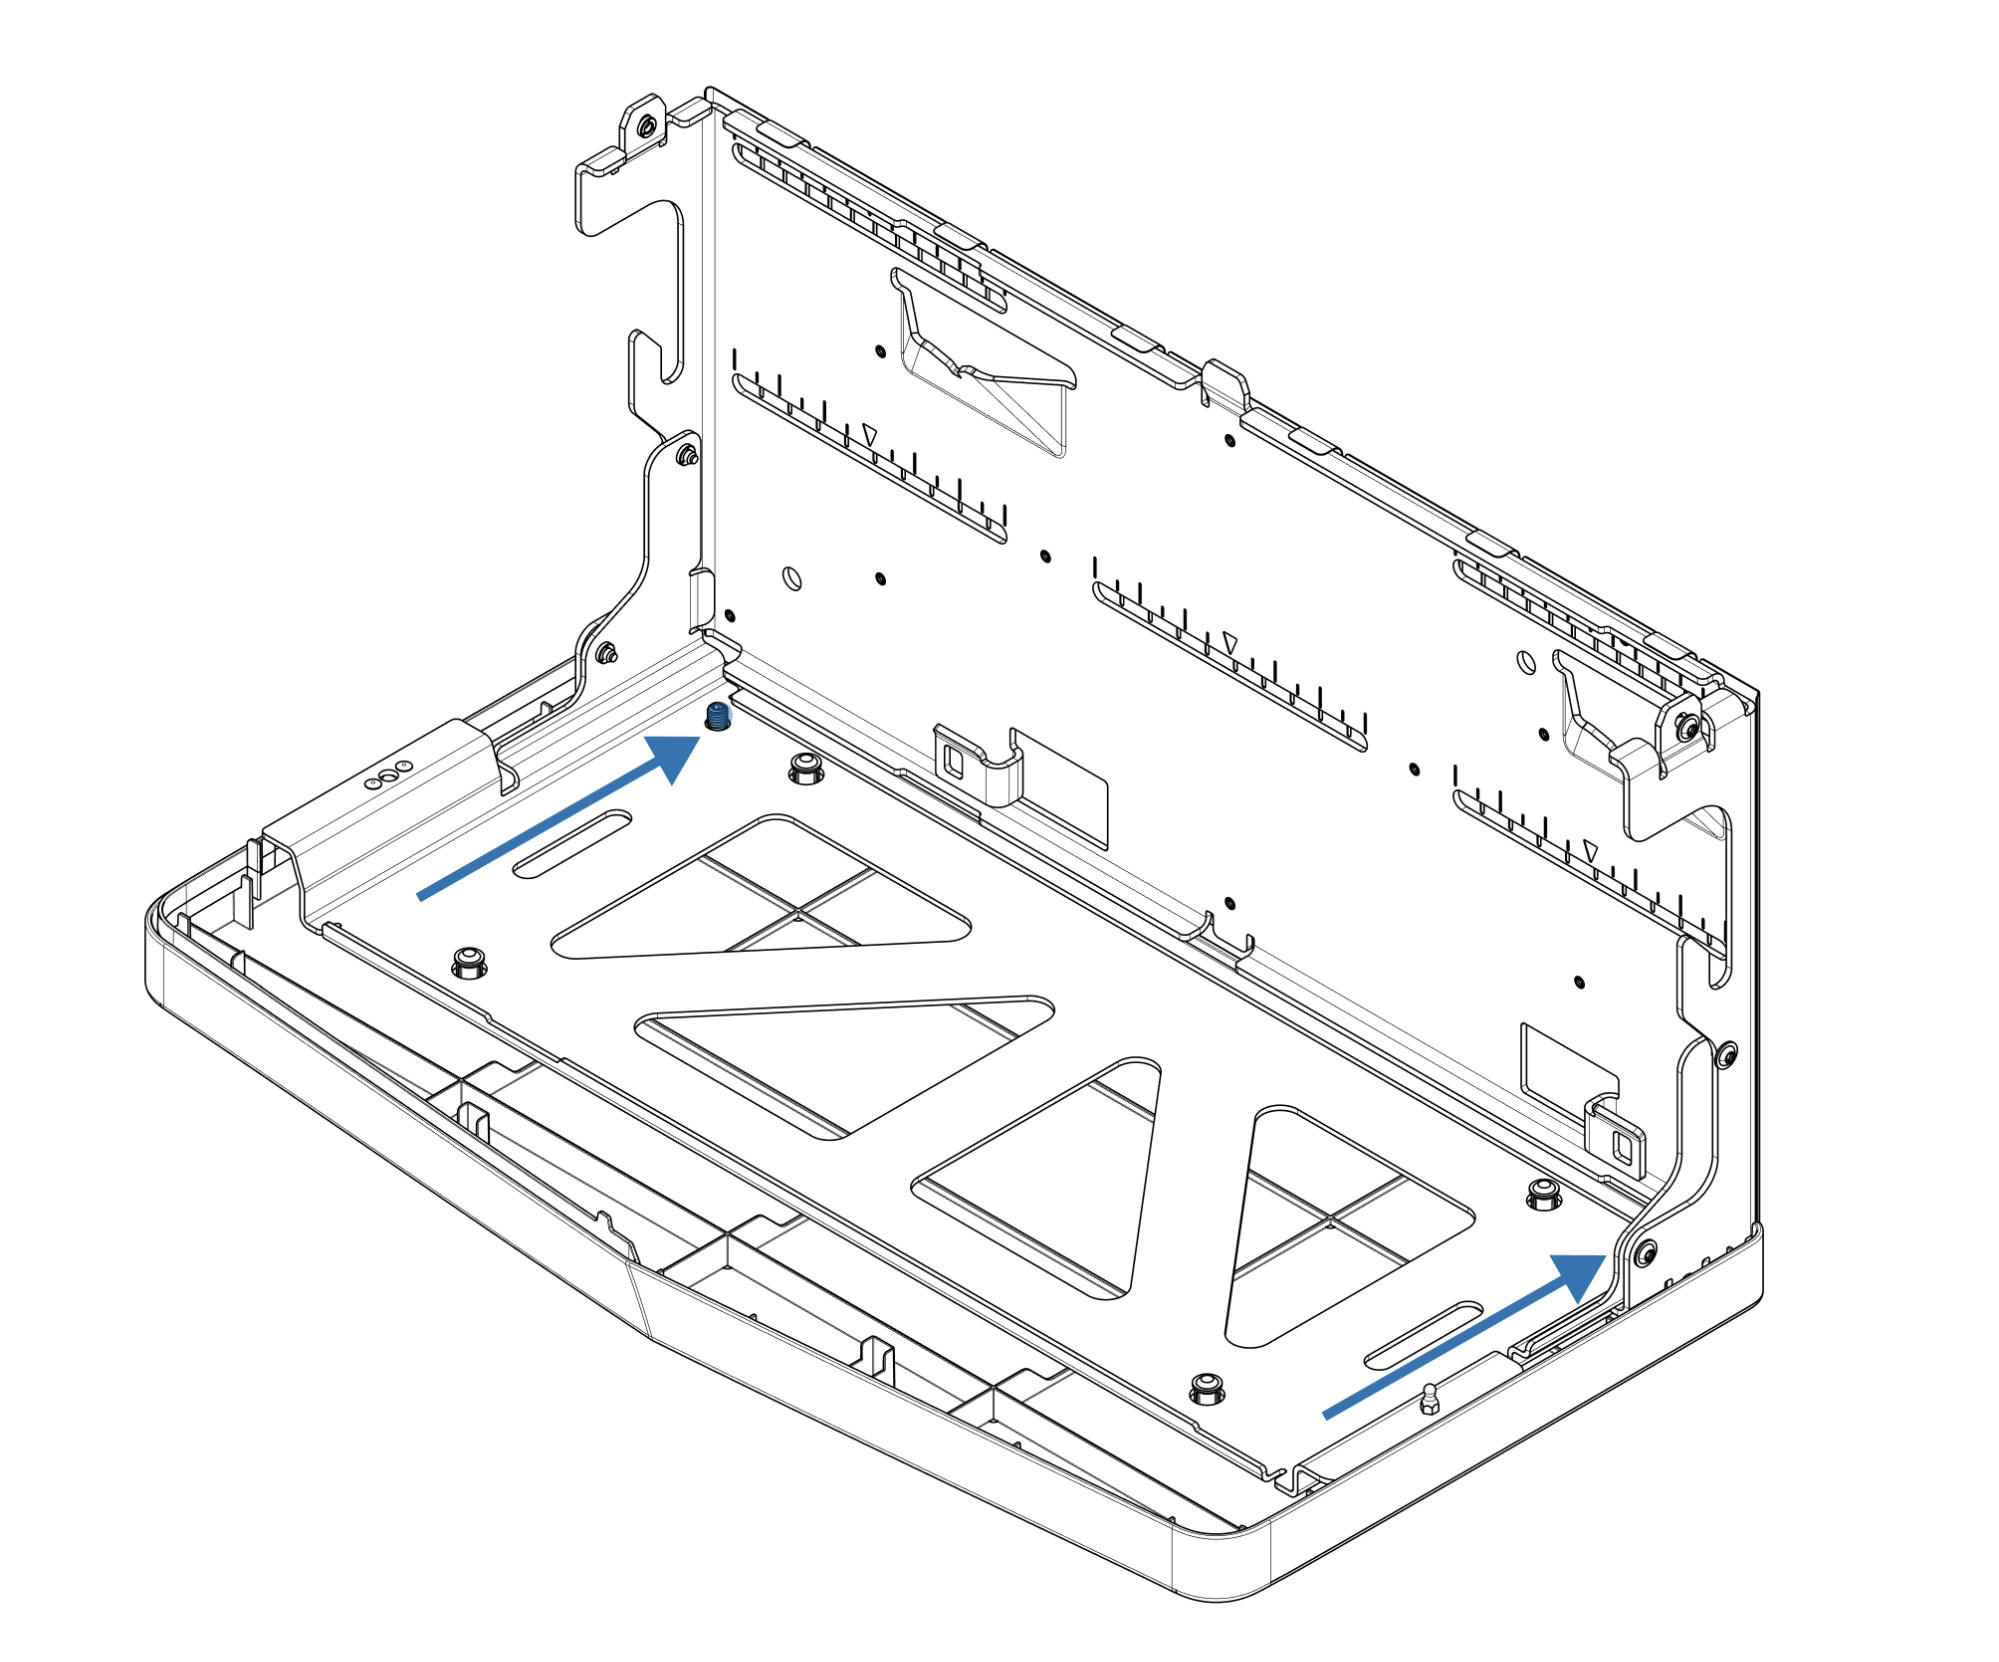
Seat and align the next battery bracket on top. Attach it to wall studs with two ¼" lag screws with at least 2" embedment, pressing down to prevent gaps. Repeat for remaining DC ESS unit brackets.
## Step 3a: Install Additional Brackets
Seat and align the next battery bracket on top. Attach it to wall studs with two ¼" lag screws with at least 2" embedment, pressing down to prevent gaps. Repeat for remaining DC ESS unit brackets.
 ## Step 3b: Secure Brackets (Floor Mount)
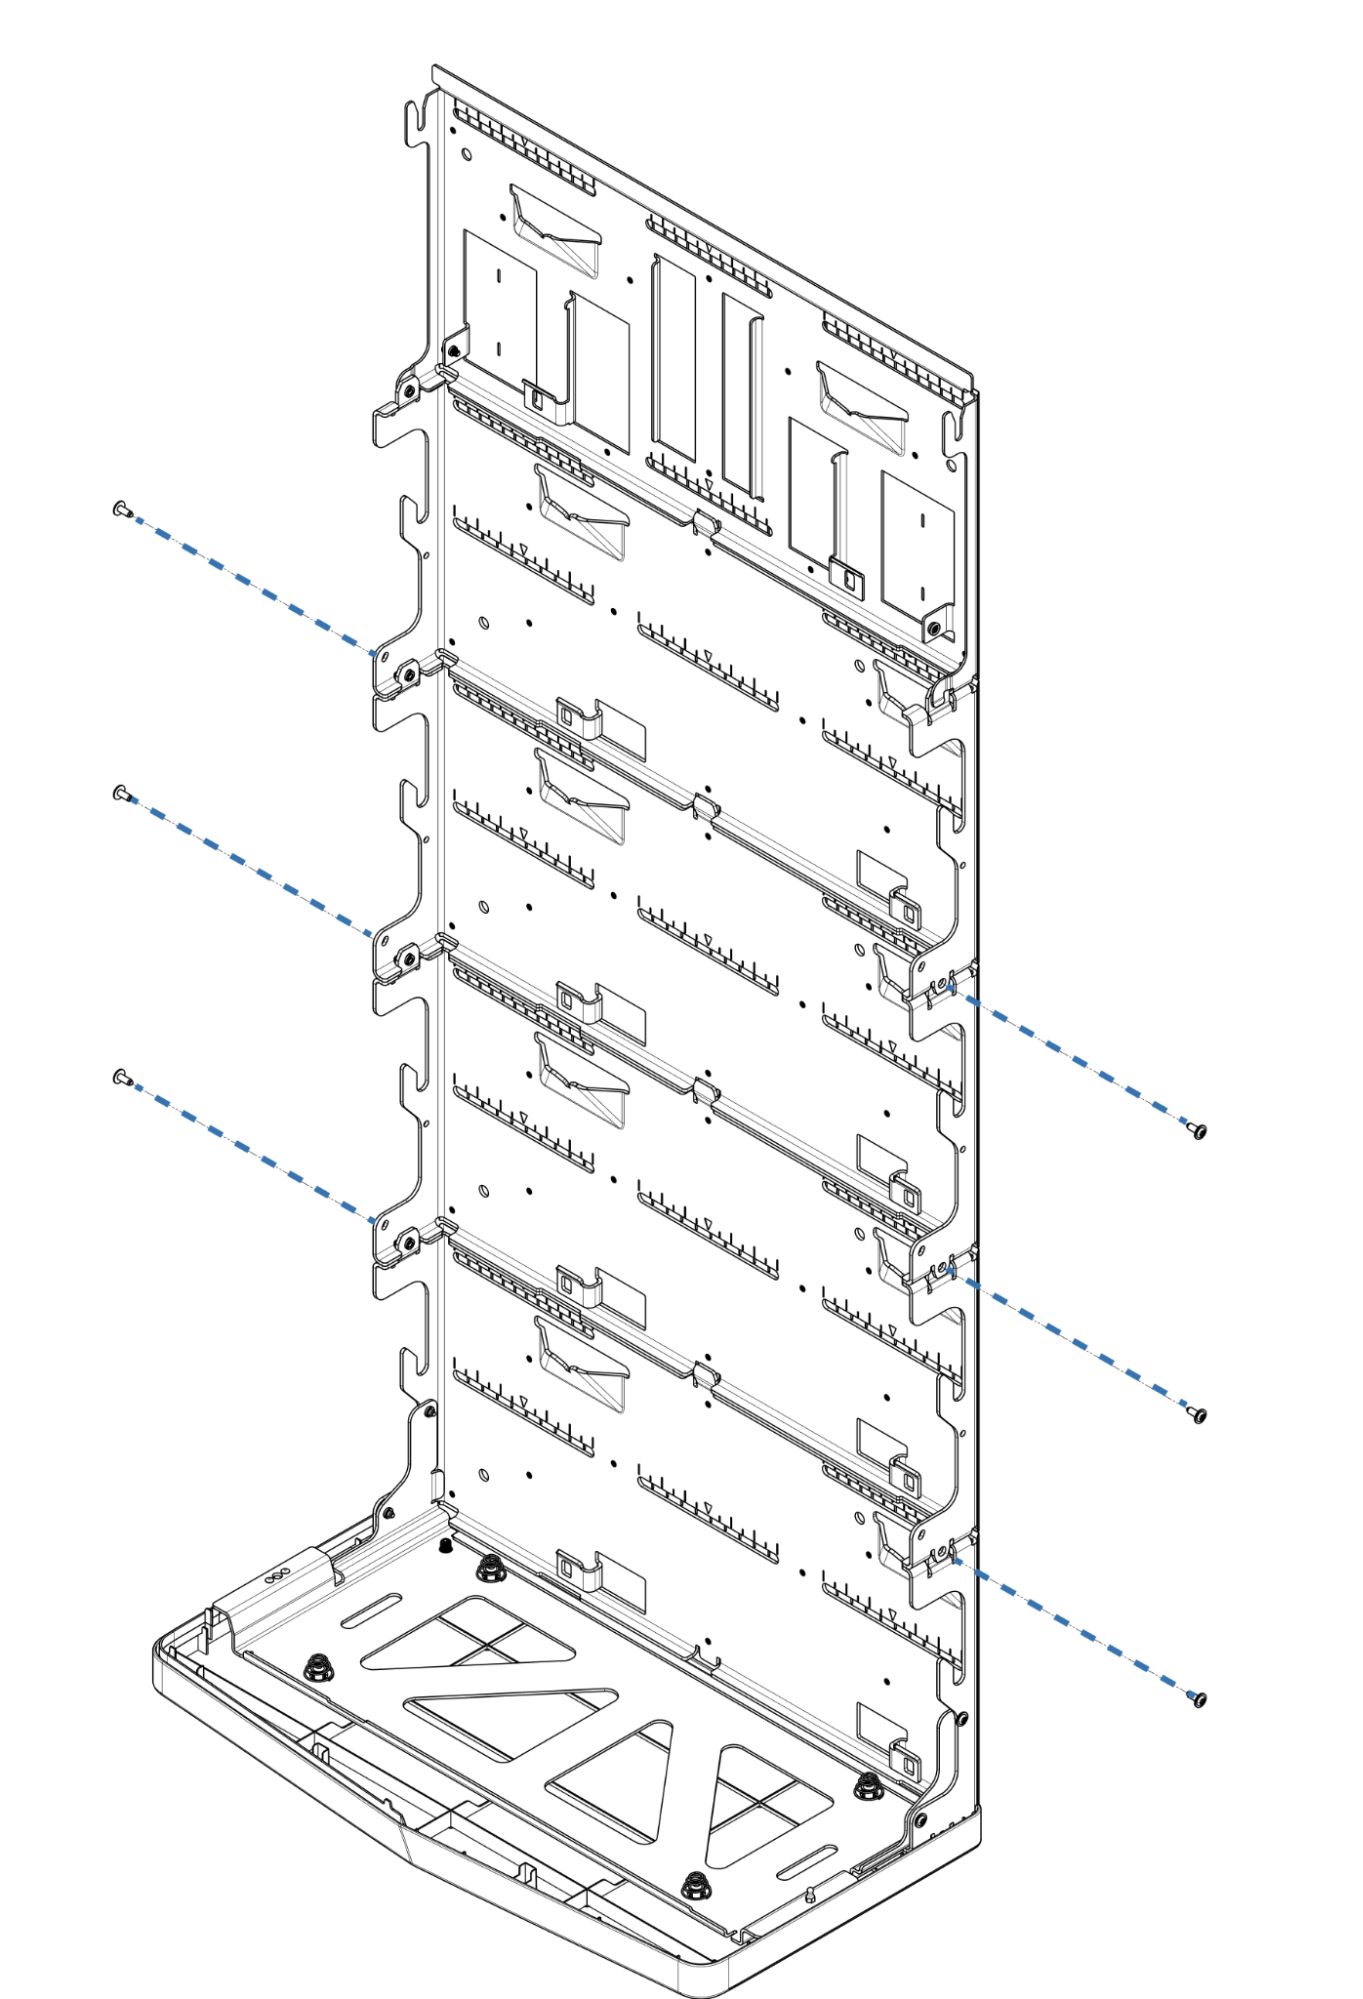
For floor mount only, secure brackets together using the provided T25 fasteners.
## Step 3b: Secure Brackets (Floor Mount)
For floor mount only, secure brackets together using the provided T25 fasteners.
 ## Step 4: Install Inverter Bracket
Install the Inverter Bracket on top. Seat it on the battery bracket and screw it into the wall.
## Step 4: Install Inverter Bracket
Install the Inverter Bracket on top. Seat it on the battery bracket and screw it into the wall.