> ## Documentation Index
> Fetch the complete documentation index at: https://installerguides.lunarenergy.com/llms.txt
> Use this file to discover all available pages before exploring further.
# Inverter Wiring
## Step 1: PV to Inverter
Land PV in the Inverter DC terminals. 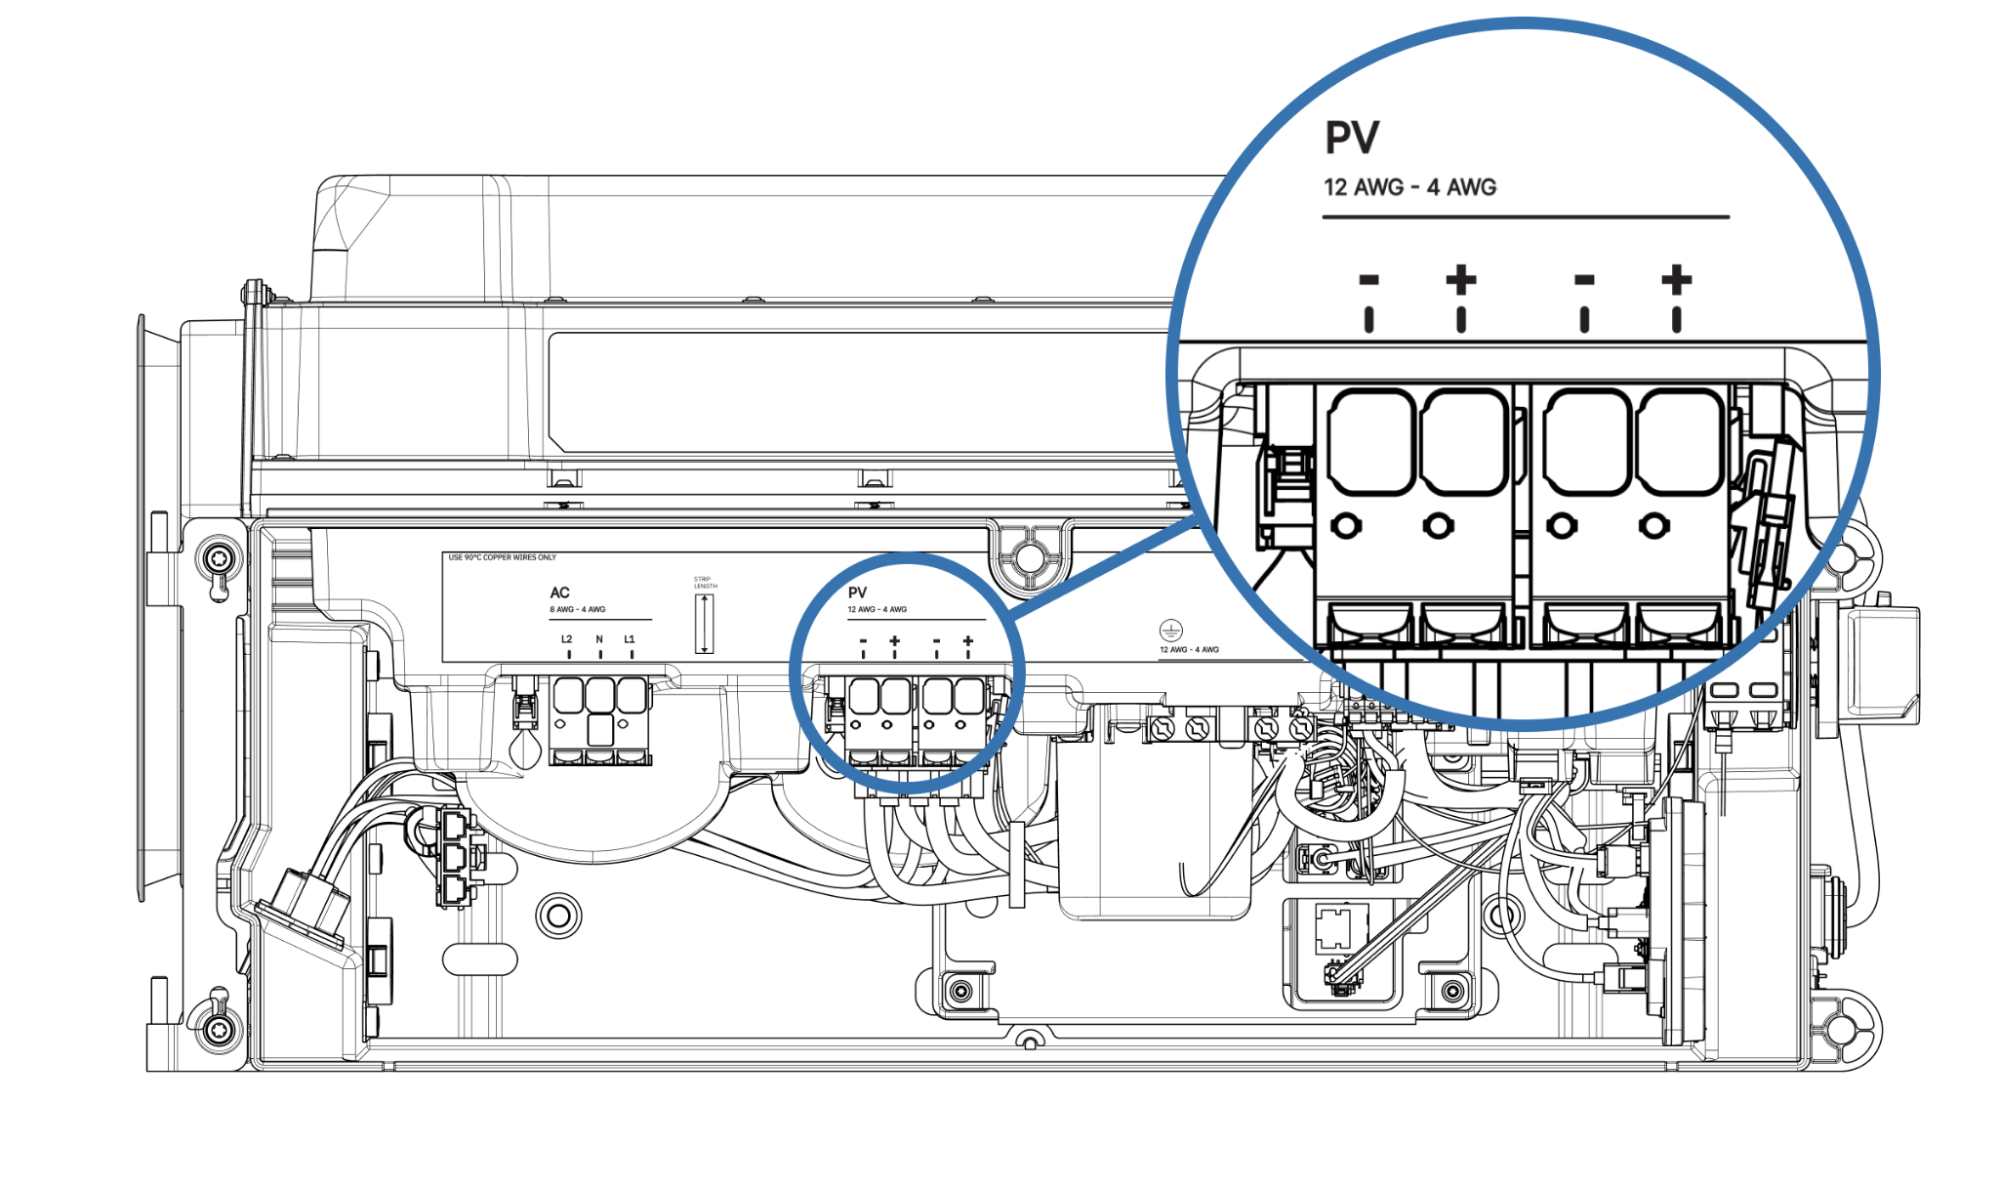 ## Step 2: Inverter to Home
Connect the AC output from the inverter to your electrical panel.
## Step 2: Inverter to Home
Connect the AC output from the inverter to your electrical panel.  ## Step 3: Low Voltage Wiring
Complete low voltage connections for communication and monitoring.
## Step 3: Low Voltage Wiring
Complete low voltage connections for communication and monitoring. 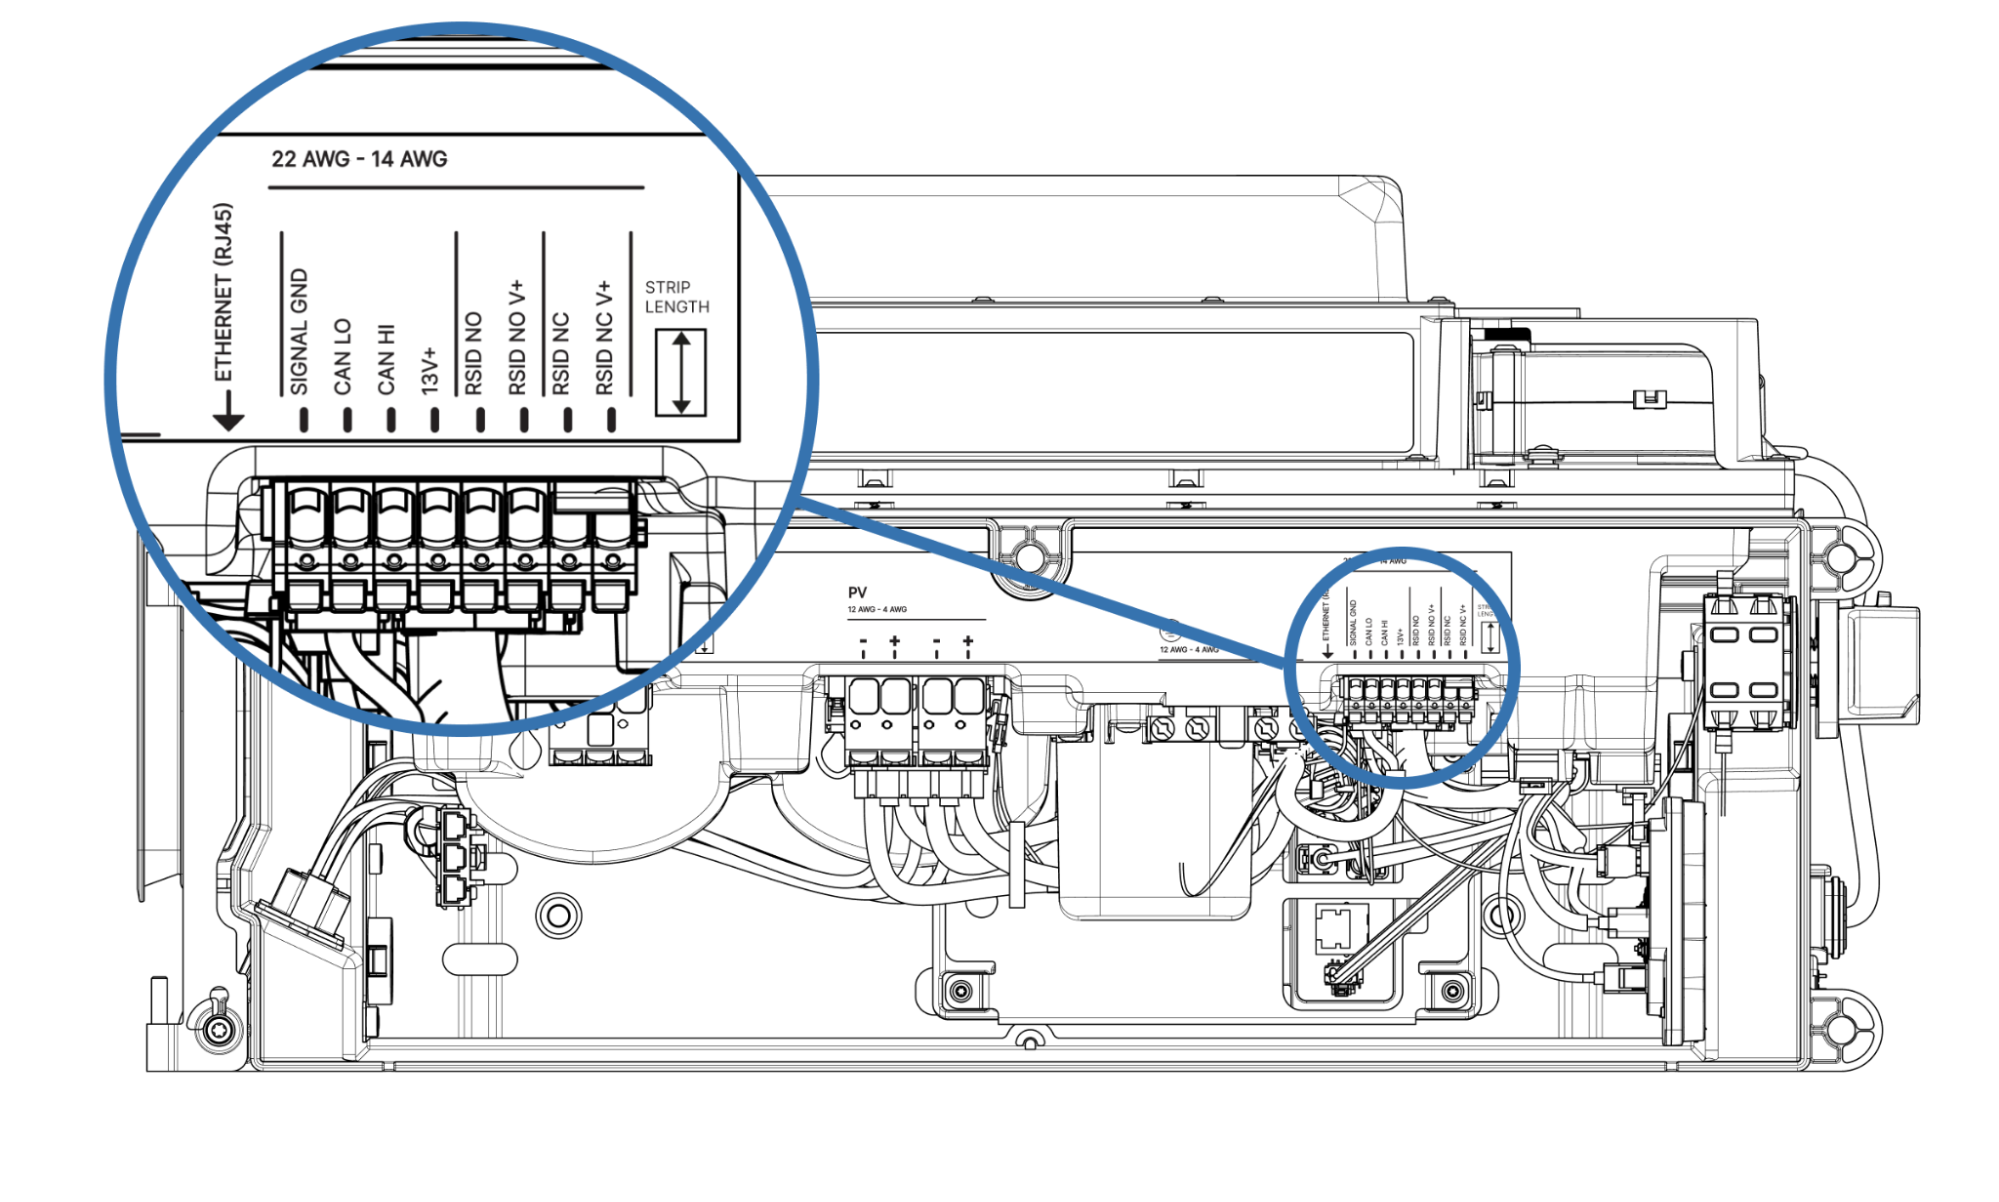
 Auxiliary Rapid Shutdown Initiation Device (RSID) can be optionally installed when desired or required by AHJs.
Terminate the CAN communication cable's drain wire (shielding conductor) at **only one end** — either the inverter or the Bridge.
## Step 4: Closing the Front Door
Auxiliary Rapid Shutdown Initiation Device (RSID) can be optionally installed when desired or required by AHJs.
Terminate the CAN communication cable's drain wire (shielding conductor) at **only one end** — either the inverter or the Bridge.
## Step 4: Closing the Front Door
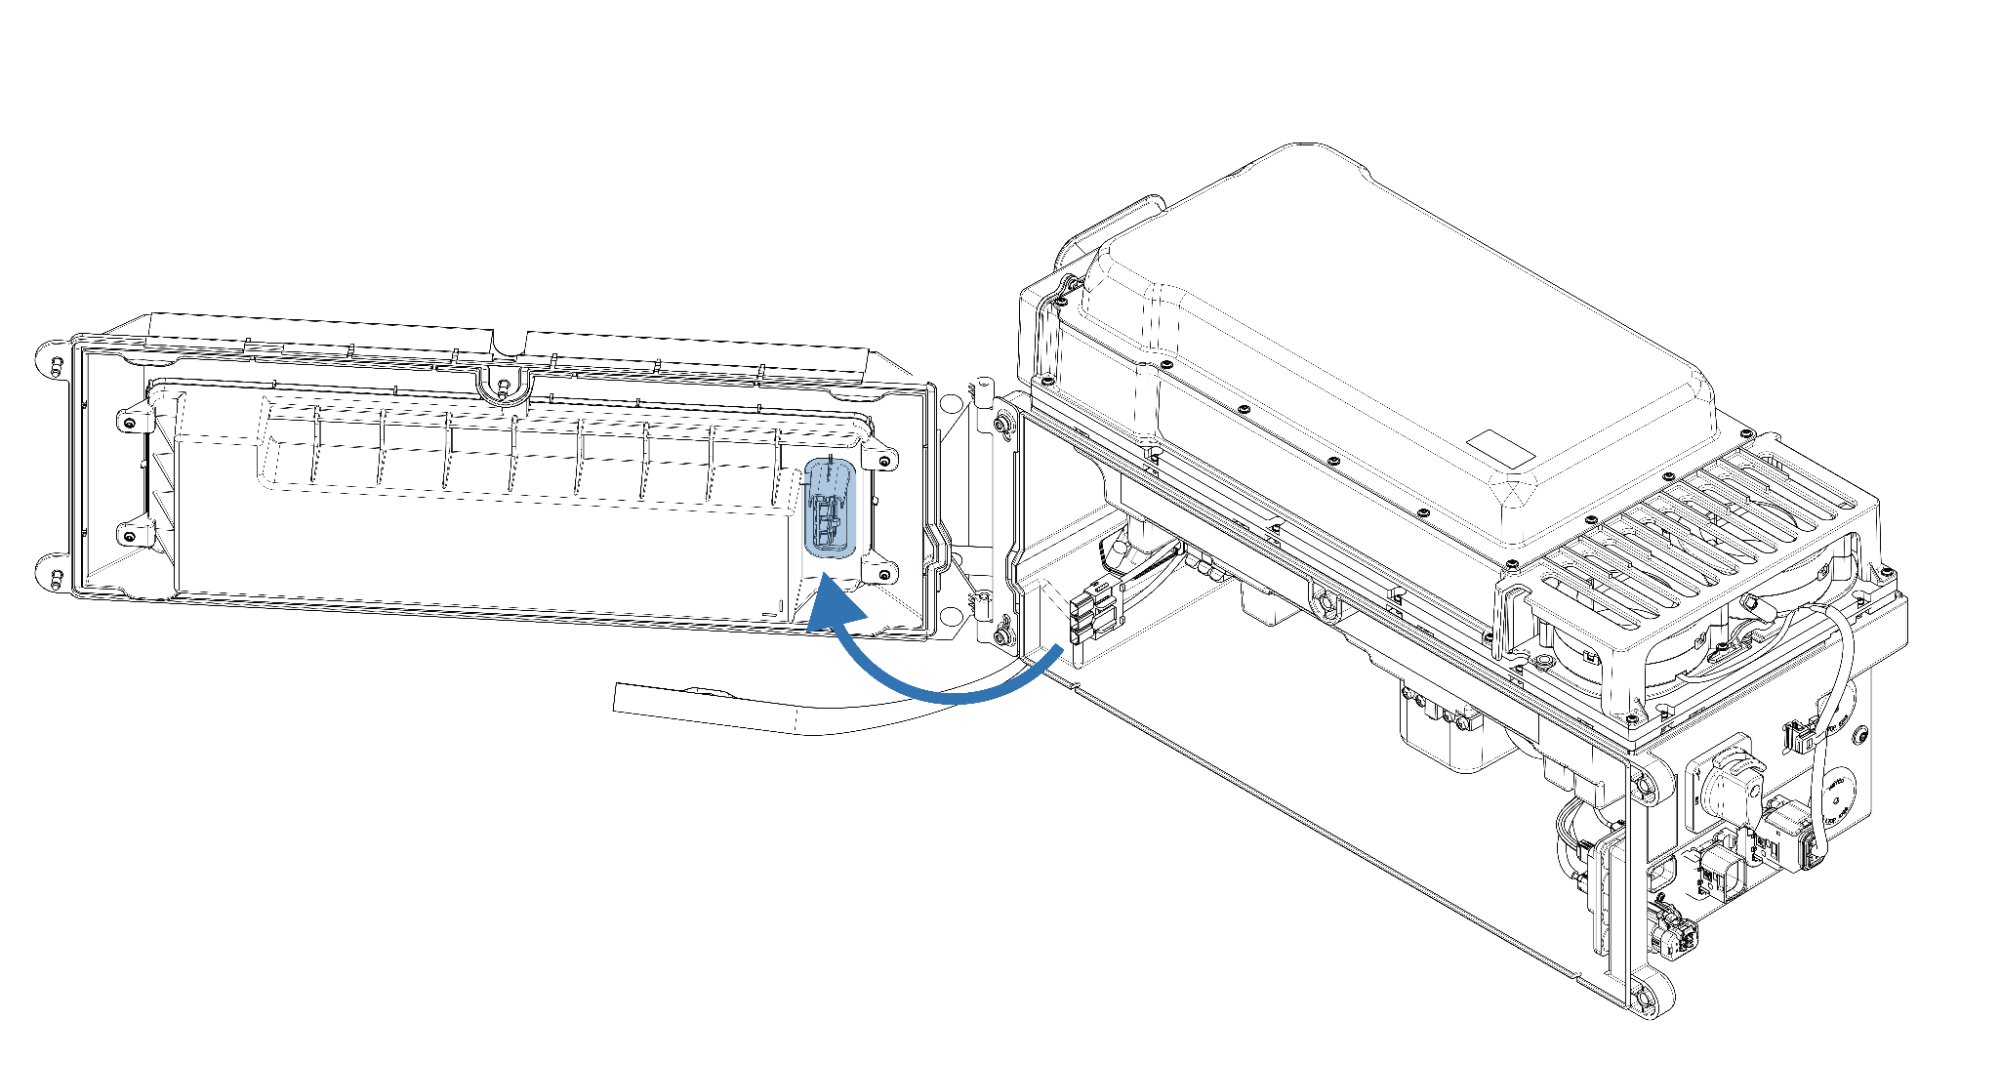
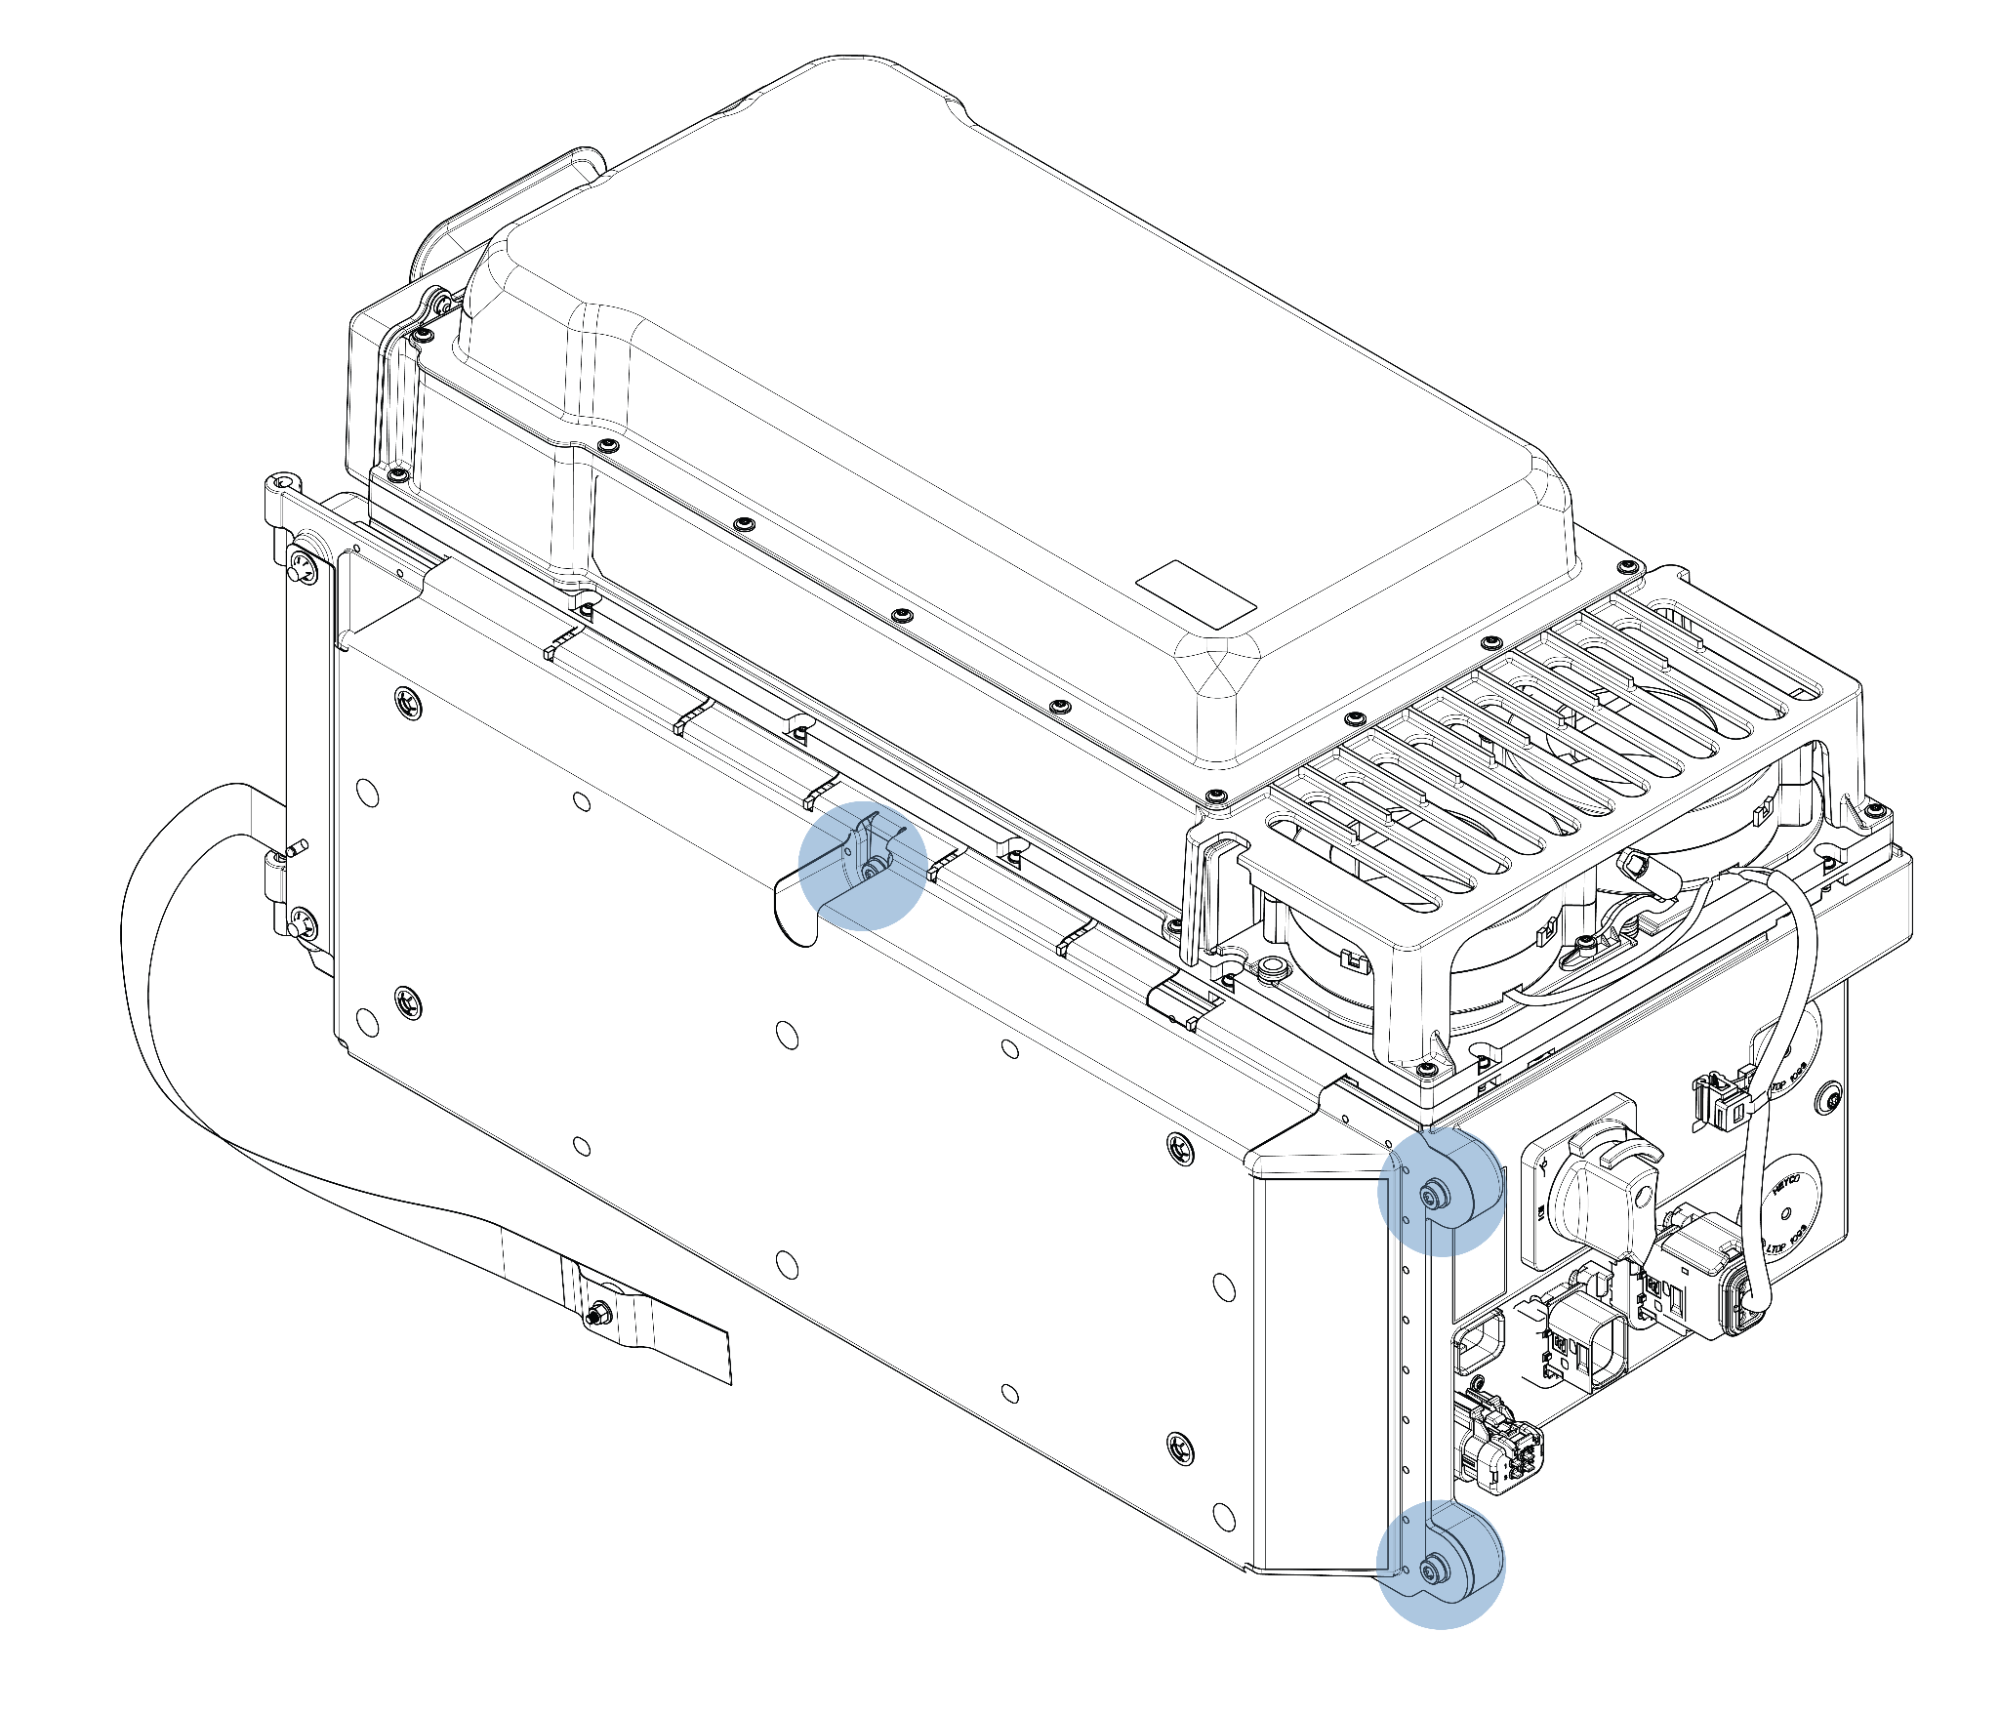 Leave the wiring compartment door open during commissioning for easier troubleshooting access. Secure the door after the commissioning job report has been sucessfully submitted.